Showing posts with label Flower. Show all posts

07 September 2012

Crochet Flower Ring and Earrings


Hello again.... Haven't post anything crochet for a while...
Today I'm gonna share a pattern for this cute little flower ring, you can wear it in any style and make it in several color to match your style. The flower are done in continuous round and the base ring is adjustable.

Material:
- steel crochet hook #4 (2.5mm)
- yarn color of your choice
- glue
- tapestry needle

Flower Pattern:
- do a magic circle
- 5sc in magic circle (5sc)
- continue with 2sc in each sc (10sc)
- *sl st in 1st sc, sc, hdc, dc, hdc, sc in the next sc. Repeat * 5x
- fasten off.

Base Ring Pattern:
- do 16 ch (it depends on your yarn / finger size)
- sc in the 2nd ch from hook, sc across (15sc)
- continue on the other side and do sc across (15sc)
- join both end by sewing or by sl st.

Assembly:
Sew the flower to the ring or just glue it if you're lazy. You can also make only the flower and glue it to the ring base that you can buy at craft shop. For the earring you just attach earring hooks to the flower.

Hope you like!!


Terms:
sc = single crochet
hdc = half double crochet
dc = double crochet
sl st = slip stitch


Add me on your list  ^^

https://www.facebook.com/crochetandlipstick https://plus.google.com/u/0/+SekarSaraswati http://instagram.com/crochetandlipstick http://www.pinterest.com/crochetandlips/boards/ https://twitter.com/crochetnlipstik https://www.bloglovin.com/people/crochetandlipstick-2150187


Reposted from my old blog http://hanaiyzm.blogspot.com before it was hack
Repost dari blog http://hanaiyzm.blogspot.com sebelum diretas

15 August 2012

Crochet Flower Hair Tie (Ikat Rambut Rajut)

Since I have nothing to do today I've been blog-walking since noon and now I decided to make some new posts on my blog. Today I'm gonna share a tutorial on how to make flower hair tie.

The flower is very easy and you can make it into anything you want such as rings, brooches, clothes embellishment, and many other things. But this time I choose to put it into a hair tie.
image
Karena saya lagi tidak ada kerjaan dan cuman blog-walking dari siang mendingan saya buat postingan baru aja kali ya? Hari ini saya mau kasi lihat cara saya mempercantik ikat rambut dengan bunga rajut.

Cara membuat bunganya juga super gampang dan gak cuman dibuat ikat rambut aja sih tapi bisa dibuat berbagai macam aksesoris cantik lainnya seperti bros, cincin, anting dll.

Here's the pattern (US version):

- I use #5 rose steel crochet hook and 3 different yarn color, but you can make it in one or two color and you can also add button as a flower center
- Make a magic circle or a loop. 6sc into the loop. Ss into first sc. Change color (*if you want). 2sc into each 6sc. Ss into first sc. Change color (*if you want). In first sc (1 hdc, 2 dc, 1 hdc). Ss into next sc. *In next sc (1 hdc, 2 dc, 1hdc). Ss into next stitch. Repeat from * until end. Fasten off and weave in ends.

I made several flower and sew it in a store bought hair band, I choose black hairband since it's discreet and versatile. Here's what it look like on the hairband.
 image
Karena saya lebih nyaman dengan US terms polanya saya share dengan versi itu ya:

- Disini saya menggunakan hakpen rose no. 5 dan 3 warna benang yang berbeda, tapi kalau mau dibuat satu warna ya sah-sah aja kok.
- Buat magic circle atau loop. 6sc ke dalam lingkaran dan ss di sc yang pertama. Ganti warna kalau mau lalu 2sc ke setiap 6sc (total 12sc) dan ss di sc yang pertama. Ganti warna lagi kalau mau dan di sc yang pertama buat *1hdc, 2dc, 1hdc dan ss di sc selanjutnya*. Ulangi ** sampai habis lalu matikan benang.


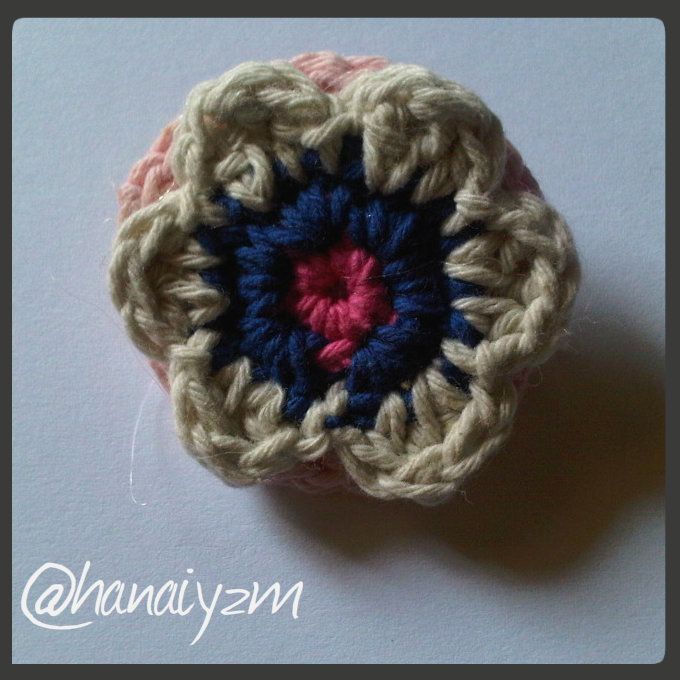
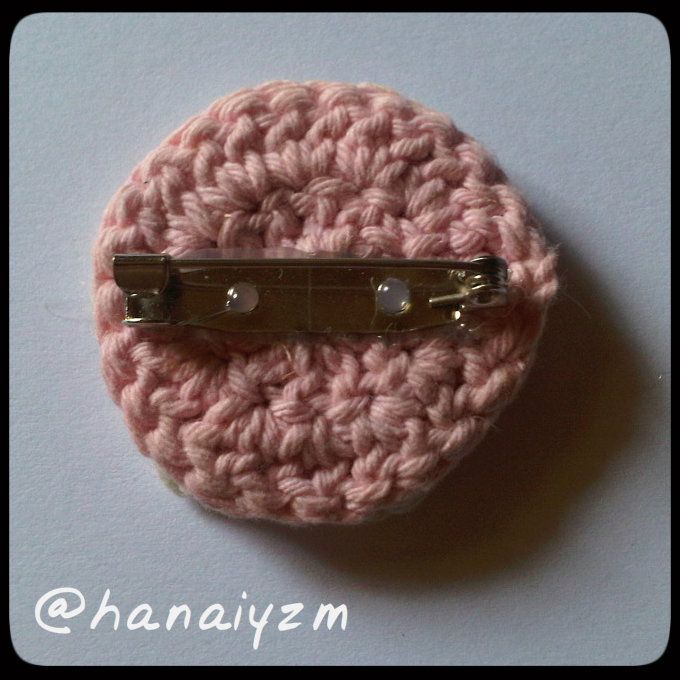
This flowers also look really cute in a brooch, just glue this flower on a base and glue the brooch pin on the other side.
 image
Bunga ini juga cantik loh kalau dibuat bros, bikinnya juga gampang. Tinggal melem bunga tadi ke sebuah base. Bisa dari kain felt atau seperti yang saya buat ini dari lingkaran rajut lalu tinggal dilem dan pasang pin deh.


Add me on your list  ^^

https://www.facebook.com/crochetandlipstick https://plus.google.com/u/0/+SekarSaraswati http://instagram.com/crochetandlipstick http://www.pinterest.com/crochetandlips/boards/ https://twitter.com/crochetandlips https://www.bloglovin.com/people/crochetandlipstick-2150187

or maybe visit my Circle Lens Shop 


Reposted from my old blog http://hanaiyzm.blogspot.com before it was hack
Repost dari blog http://hanaiyzm.blogspot.com sebelum di hack

07 August 2012

Crochet Rosette Bib Necklace

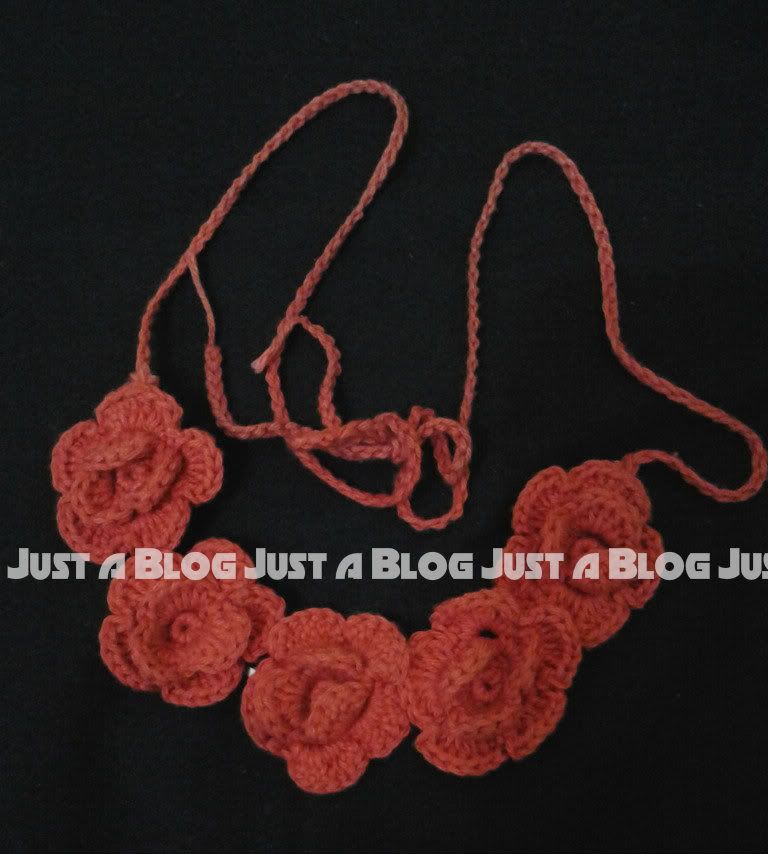
Hei ho udah lama juga tidak berbagi hobi rajut merajut nih... Kali ini mau berbagi ide dan pola untuk bikin kalung mawar yang idenya aku dapat secara tidak sengaja. Awalnya adalah secara tidak sengaja aku masukin *maaf* bra ke dalam mesin cuci, walhasil rusaklah dan wire di dalamnya sampai keluar. Isenglah kucabut si wire itu dan ternyata bentuknya menarik he he he, kupikir lucu juga kalau kalung bentuknya gitu jadi kubuatlah bunga-bungaan mawar untuk dibungkus di sekitar wire itu.
Hei ho.. It's been a while since my last crochet post so today I'm gonna share about a my latest crochet necklace creation and it's also a recycle idea too! I got the idea when I saw an exposed wire from a ruined bra and when I pulled the wire out I thought that it would be a nice base for a crochet necklace.

08 March 2011

Crochet Necklace Variation (Variasi Kalung Rajut)


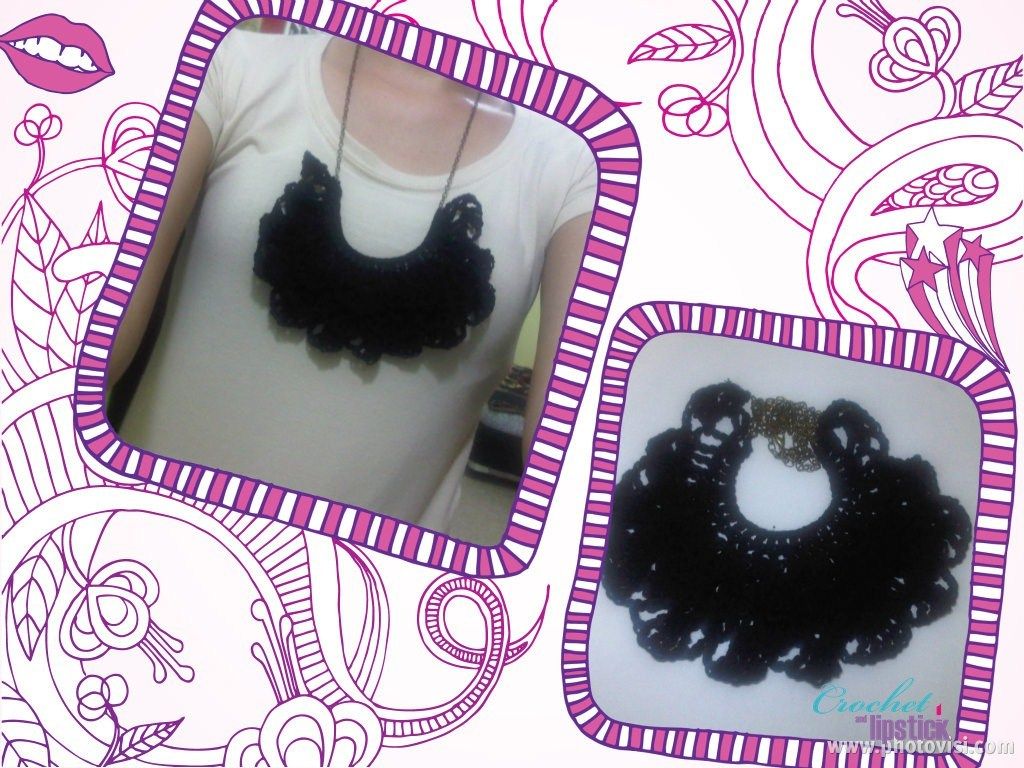
I've been looking for a cute pattern to make a crochet accessories and I stumbled upon A Common Thread's blog. Her blog is really interesting, she has a great sense of fashion and she gives some of her pattern for free. My most favorite pattern from her blog is the crochet bib necklace, especially the one that she made and wear in her blog. I've been tinkering with her pattern and make some other inspiration from her pattern.

 
Untuk yang suka dengan pola-pola yang lucu untuk dibuat aksesoris coba deh mampir ke blognya A Common Threat. Saya suka sekali dengan isi-isi blognya dia dan terutama pola-pola rajutan gratisannya. Pola favorit saya dari blognya adalah Crochet Bib Necklace terutama yang dia pakai di blognya. Hasil yang saya share disini adalah merupakan modifikasi saya dari pola blognya.

24 July 2010

Crochet: Flower Accessories (Aksesoris Bunga Rajut)


This hair clip is a combination of two flowers and leaves, the flowers are pelargonium and daisy. It is pretty easy to make this flower especially if we're accustomed to the pattern and stitches. Once the flowers and leaves just put it in your hair clip using glue gun and Voila!! A regular ol' hair clip turns into a cuter hair clip!! \(^_^\) (/^_^)/


Jepit rambut ini saya buat dari kombinasi bunga dan daun rajut. Pola bunga yang saya gunakan adalah pola untuk bunga Pelargonium dan Daisy. Pembuatannya cukup mudah dan cocok untuk pemula yang ingin mencoba membuat aksesoris rajut. Selain itu cocok juga untuk yang ingin menyulap jepit rambut lama yang dimiliki supaya jadi baru kembali \(^_^\) (/^_^)/. Polanya bisa dilihat di buku "Crochet Accessories" yang bisa kamu beli di Toko Buku.

Crochet: Centifolia Rose (Mawar Rajut)


Flower accessories won't go out of date in any occasion if I may say so. I made the brooch above by combining a few roses and leaves and then glued them onto a felt fabric.


21 July 2010

Crochet: Camomile Necklace (Kalung Rajut Camomile)


This Camomile Necklace is pretty easy to make and can be in all kinds of color that you like. At first I made a bunch of these necklaces for sale but ended up using it myself instead.http://www.emocutez.com The pattern for this flower can be found in "Crochet Accessories" book by Ratu Sri Hastutie and in her book she made this flower into a brooch and earring but since I don't have a brooch pin right now and I think it's too big for an earring I make a necklace instead. The flower and leaves are glued together.

Material:

- Crochet Hook #5
- Yarn
- Glue Gun
Chamomile Pattern:

Magic ring

Round 1: 2ch and 5sc inside the ring. Join with sl st.

Round 2: 1ch and 1sc from ch in round 1. 2sc in each sc in round 1 and sl st in ch (11 sc)

Round 3: 1ch and 2sc. *1sc in the next sc, 2sc in the next sc *, repeat* until the end and sl st in ch (17 sc)

Round 4: 1ch and *2sc in the next sc and 1sc in the next 2sc *, repeat* 5x and then 2sc and 1sc and sl st in ch (23 sc)

Round 5: 1ch and *2sc in the next sc and 1sc in the next 3sc *, repeat* 5x and then 2sc and 1sc, 1sc and sl st in ch (29 sc) (change color here)

Round 6: *3ch and 1dc, do 1dc and 3ch and 1dc*, repeat* 9x. Fasten off. (change color here)

Leaf Pattern:

Round 1: Make 13 ch and 1sc in 2nd chain from hook and in the next 2 ch (3sc), and then make 1dc in the next 6ch (6dc), and then make 1sc in the last remaining chain (3sc). Do not fasten off. [half 1st leaf made]

Round 2: Make 25ch and do sl st in each of the ch (25 sl st) [stem made]

Round 3: Make 13 ch and 1sc in 2nd chain from hook and in the next 2 ch (3sc), and then make 1dc in the next 6ch (6dc), and then make 1sc in the last remaining chain (3sc). [half 2nd leaf made]

Round 4:Into the 1st leaf make 1sc in the next 3ch (3sc), 1dc in the next 6ch (6dc), and then make 1sc in the last remaining chain (3sc). Fasten off. [1st leaf made]

Round 5: Join yarn in the 2nd leaf. 1sc in 2nd chain from hook and in the next 2 ch (3sc), and then make 1dc in the next 6ch (6dc), and then make 1sc in the last remaining chain (3sc). Fasten off. [2nd leaf made].

Note:
You can make the flower in three color, two color, or even one color. The leaves can be made in any color you like.

Terms:
ch = chain
dc = double crochet
sc = single crochet
sl st = slip stitch


You can also join a few of this necklace to make an awesome bib necklace. The flowers are join by gluing it on a felt fabric.


Kalung bunga Camomile ini sangat mudah dibuat dan dengan berbagai macam warna. Pada awalnya saya membuat kalung ini untuk dijual tapi lama-kelamaan malah seering dipakai sendiri juga he he he.http://www.emocutez.com Pola dari bunga ini terdapat pada buku "Crochet Accessories" oleh Ratu Sri Hastutie dan di buku beliau bunga ini dibuat menjadi bros dan anting-anting namun karena saya saat ini sedang tidak memiliki pin bros dan sepertinya agak besar kalau dipakai sebagai anting-anting jadi akhirnya saya buat menjadi kalung. Bunga dan daunnya cukup disambung dengan lem saja.

Material:

- Hakpen #5
- Benang Katun
- Lem Tembak
Pola Chamomile:

Buat magic ring

Round 1: 2ch dan 5sc di dalam MR. Gabung dengan sl st.

Round 2: 1ch dan 1sc pada ch di round 1. 2sc di setiap sc di round 1 dan sl st pada ch (11 sc)

Round 3: 1ch dan 2sc. *1sc pada sc selanjutnya dan 2sc pada sc selanjutnya *, ulangi** sampai akhir dan sl st pada ch (17 sc)

Round 4: 1ch dan *2sc pada sc selanjutnya dan 1sc pada 2sc selanjutnya*, ulangi** 5x dan kemudian 2sc dan 1sc dan akhiri dengan sl st in pada ch (23 sc)

Round 5: 1ch dan *2sc pada sc selanjutnya dan 1sc pada 3sc selanjutnya *, ulangi** 5x dan kemudian 2sc dan 1sc, 1sc dan sl st pada ch (29 sc) (ganti warna)

Round 6: *3ch dan 1dc, lalu 1dc dan 3ch dan 1dc*, ulangi** 9x. Matikan. (ganti warna)

Pola Daun:

Round 1: Buat 13 ch dan 1sc pada ch ke-2 dari hakpen dan pada 2 ch selanjutnya (3sc), selanjutnya buat 1 dc pada 6 ch selanjutnya (6 dc), terakhir buat 1 sc pada sisa ch yang tersisa (3 sc). Jangan dimatikan. [setengah daun pertama terbuat]

Round 2: Buat 25 ch dan sl st di setiap ch (25 sl st) [batang daun].

Round 3: Buat 13 ch dan 1sc pada ch ke-2 dari hakpen dan pada 2 ch selanjutnya (3sc), selanjutnya buat 1 dc pada 6 ch selanjutnya (6 dc), terakhir buat 1 sc pada sisa ch yang tersisa (3 sc). Jangan dimatikan. [setengah daun kedua terbuat]

Round 4: Pada rangkaian daun pertama buat 1 sc pada 3 ch selanjutnya (3 sc), 1 dc pada 6 ch selanjutnya (6 dc) dan 1 sc pada sisa ch (3 sc). Matikan. [daun pertama terbuat]

Round 5: Gabung benang pada ujung daun kedua kemudian buat 1 sc pada 3 ch pertama (3 sc), 1 dc pada 6 ch selanjutnya (6 dc) dan 1 sc pada sisa ch (3 sc). Matikan. [daun kedua terbuat].

Note:
Bunga ini dapat dibuat dalam satu warna, dua warnam tiga warna atau bahkan warna-warni. Daunnya pun dapat dibuat dengan warna sesuka hati.

Istilah:
ch = chain
dc = double crochet
sc = single crochet
sl st = slip stitch


Beberapa bunga juga dapat digabung menjadi sebuah statement necklace, caranya cukup dengan melem beberapa bunga pada kain felt sebagai dasarnya.


Add me on your list  ^^

https://www.facebook.com/crochetandlipstick https://plus.google.com/u/0/+SekarSaraswati http://instagram.com/hanaiyzm http://www.pinterest.com/hanaiyzm/boards/ https://twitter.com/hanaiyzm http://www.bloglovin.com/en/blog/3988065

or maybe visit my Shop 


Reposted from my old blog http://hanaiyzm.blogspot.com before it was hack
Repost dari blog http://hanaiyzm.blogspot.com sebelum di hack
Related Posts Plugin for WordPress, Blogger...