Showing posts with label Craft. Show all posts

15 March 2015

DIY: Brush Tree


It's been a while since my last DIY Project right? So today's post is about DIY Brush Tree. What's a Brush Tree you say? Well Brush Tree is a thingamajig that you use to help you dry your makeup brushes vertically and off the counter. By drying you makeup brushes that way, the bristles are protected and also protect it from contamination. Here's what the Brush Tree looks like.
image
Sudah lama ya saya tidak sharing DIY Project? Nah kali ini saya mau share tentang DIY Brush Tree buatan saya. Well... sebetulnya lebih mirip Brush Dingklek sih dibanding Brush Tree but u know what I mean lah... Apa fungsinya? Benda ini berfungsi untuk membantu mengeringkan Makeup Brush kita setelah kita cuci dengan posisi vertikal dan menghindari kontaminasi juga. Kalau Brush Tree yang dijual di pasaran sih bentuknya seperti yang di bawah ini.

21 February 2014

Crochet: Table Runner

Hi...

I think I've mention before that my apartment is undergoing a renovation and it's been collecting dust everywhere right? Well I've finally finished cleaning them up and tidying all of my stuff since I now have more space to keep stuffs and things. I use to have several big plastic containers (the one that had wheel on it) but now I'm planning to get rid of them cos it's been taking up so much space. Anyway it had nothing to do with the renovation though but my Blu-Ray player looks really plain so I wanted to make it look nicer. I decided to put a crochet on top of it but when I search for a table cloth or table runner the one that comes out are mostly in doily type and that looks like a grandma thing . So I google for a while and I found a perfect one at Crochet n More. Here's what mine looks like...


14 February 2014

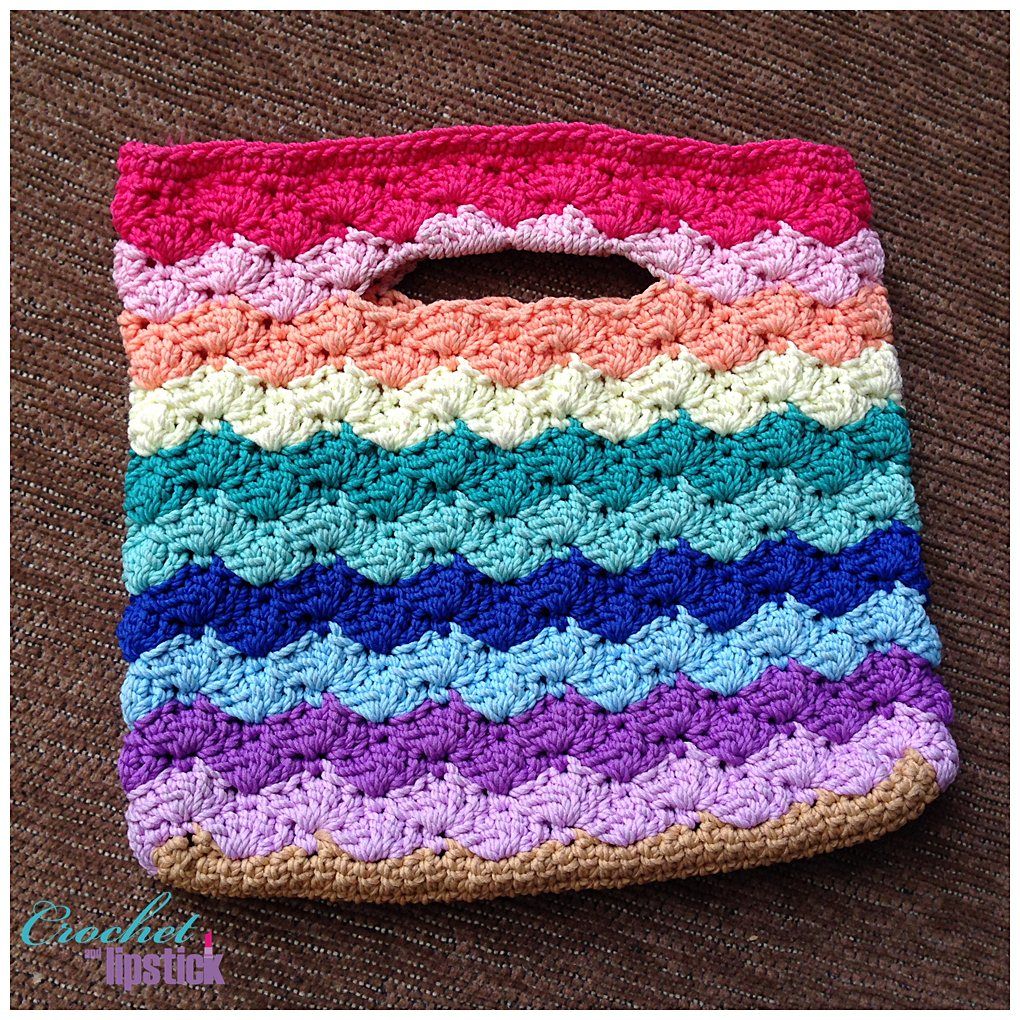
Crochet: Rainbow Clutch

Hi again!!

Sorry I haven't post any crochet-related post for a while.... I do make several crochet projects but most of them are a gift for someone and I forgot to take pictures of it too... #sigh... Anyway here's my latest crochet project that I remember to take pictures on. 


07 October 2013

Crochet: Totoro Amigurumi


A quick post since I'm pretty lazy today but still wants to be at least somewhat productive so I'm just gonna post a bunch of picture of Totoro from the anime My Neighbour Totoro or Tonari no Totoro in Japanese. Totoro is one of my favorite anime from Studio Ghibli but then when it comes to Studio Ghibli nothing is bad he he he I love em all!! I've actually have made this amigurumi months and months ago for my nephew Aradea but forgot to take pictures. The only one I had was this. 
 

I know it's totally biased but isn't my nephew's cute!!!  He also looks so happy when I give him the Totoro. Last August when I went to Jakarta for a family reunion I ask my cousin if I can take pictures of the Totoro and luckily it's still there. Here's how it look now...

19 August 2013

Crochet Collar (Kerah Rajut)

Heidy Ho!!

I'm so excited to share this lovely crochet collar that I just made!! It's really easy to make and I think will look lovely with any kind of yarn. Although by using chunkier yarn the collar would finish faster. Here are the pics!!


I just got this kawaii bunny dress from one of my bff!! Perfect for the collar that I just made.


I run out of blue yarn so I change the edging into black also I don't have a suitable button so I made my own button from the same black yarn.


This baby pink collar is made from local cotton yarn. It took longer to made since the yarn is not as chunky as the blue collar. If you want to make this beautiful collar you can visit Lulu Loves Crochet for the pattern.


Add me on your list  ^^

https://www.facebook.com/crochetandlipstick https://plus.google.com/u/0/+SekarSaraswati http://instagram.com/crochetandlipstick http://www.pinterest.com/crochetandlips/boards/ https://twitter.com/crochetnlipstik https://www.bloglovin.com/people/crochetandlipstick-2150187


Reposted from my old blog http://hanaiyzm.blogspot.com before it was hack
Repost dari blog http://hanaiyzm.blogspot.com sebelum diretas

14 September 2012

Twotone Crochet Keychain


I tend to loose my key or even a keychain that I'm gonna put the key on... Clumsy me... So rather than buying one again and again... Make one instead! This keychain uses two yarn color and has two different pattern on each side. I'm not really know which one the front side and which one is the back side, but either way this is a cute keychain!!

I forgot what hook size I use, but I think it's between #4-#5 (2.5mm - 3mm) and two colors of local cotton yarn. The keychain are made in continuous rounds and join by sewing. I wanted a flatter keychain so I don't put fiberfill on the inside while sewing like the original one. 

If you're interested, this crochet keychain is created by Midnight Knitter and you can see the pattern here.


Add me on your list  ^^

https://www.facebook.com/crochetandlipstick https://plus.google.com/u/0/+SekarSaraswati http://instagram.com/crochetandlipstick http://www.pinterest.com/crochetandlips/boards/ https://twitter.com/crochetnlipstik https://www.bloglovin.com/people/crochetandlipstick-2150187


Reposted from my old blog http://hanaiyzm.blogspot.com before it was hack
Repost dari blog http://hanaiyzm.blogspot.com sebelum diretas

02 September 2012

Crochet Circles Idea

I simple crochet circle can be turn into some cute accessories. You can make them in any way you like...

Here some ideas...


You can make it into earrings!! One color or multicolor both will look good. A small or a big one is cute too!! It's a great way to make use of leftover yarn.


A crochet circle ring will look cuter in multicolor yarn.


Combining several crochet circles in different color, shape and size will make a nice necklace.


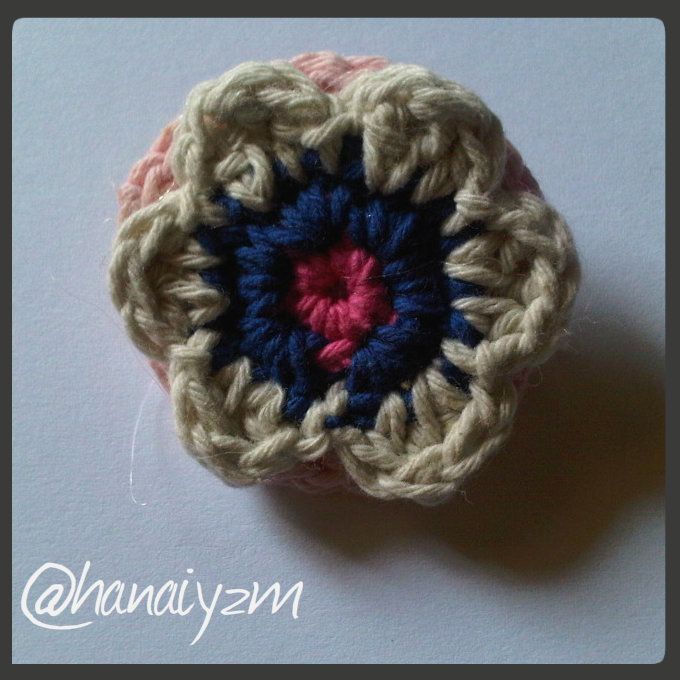
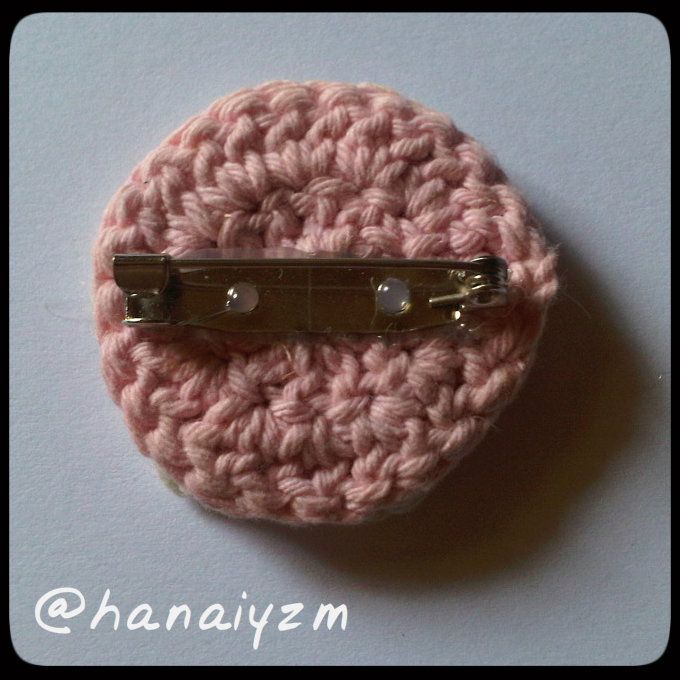
Crochet circle can also be a nice foundation for a brooch, I prefer a crochet circle rather than fabric for a brooch back foundation. The circle also gives a certain "oomph" to a regular small flower brooch.


Do you have other ideas for crochet circle?


Add me on your list  ^^

https://www.facebook.com/crochetandlipstick https://plus.google.com/u/0/+SekarSaraswati http://instagram.com/crochetandlipstick http://www.pinterest.com/crochetandlips/boards/ https://twitter.com/crochetnlipstik https://www.bloglovin.com/people/crochetandlipstick-2150187


Reposted from my old blog http://hanaiyzm.blogspot.com before it was hack
Repost dari blog http://hanaiyzm.blogspot.com sebelum diretas

15 August 2012

Crochet Flower Hair Tie (Ikat Rambut Rajut)

Since I have nothing to do today I've been blog-walking since noon and now I decided to make some new posts on my blog. Today I'm gonna share a tutorial on how to make flower hair tie.

The flower is very easy and you can make it into anything you want such as rings, brooches, clothes embellishment, and many other things. But this time I choose to put it into a hair tie.
image
Karena saya lagi tidak ada kerjaan dan cuman blog-walking dari siang mendingan saya buat postingan baru aja kali ya? Hari ini saya mau kasi lihat cara saya mempercantik ikat rambut dengan bunga rajut.

Cara membuat bunganya juga super gampang dan gak cuman dibuat ikat rambut aja sih tapi bisa dibuat berbagai macam aksesoris cantik lainnya seperti bros, cincin, anting dll.

Here's the pattern (US version):

- I use #5 rose steel crochet hook and 3 different yarn color, but you can make it in one or two color and you can also add button as a flower center
- Make a magic circle or a loop. 6sc into the loop. Ss into first sc. Change color (*if you want). 2sc into each 6sc. Ss into first sc. Change color (*if you want). In first sc (1 hdc, 2 dc, 1 hdc). Ss into next sc. *In next sc (1 hdc, 2 dc, 1hdc). Ss into next stitch. Repeat from * until end. Fasten off and weave in ends.

I made several flower and sew it in a store bought hair band, I choose black hairband since it's discreet and versatile. Here's what it look like on the hairband.
 image
Karena saya lebih nyaman dengan US terms polanya saya share dengan versi itu ya:

- Disini saya menggunakan hakpen rose no. 5 dan 3 warna benang yang berbeda, tapi kalau mau dibuat satu warna ya sah-sah aja kok.
- Buat magic circle atau loop. 6sc ke dalam lingkaran dan ss di sc yang pertama. Ganti warna kalau mau lalu 2sc ke setiap 6sc (total 12sc) dan ss di sc yang pertama. Ganti warna lagi kalau mau dan di sc yang pertama buat *1hdc, 2dc, 1hdc dan ss di sc selanjutnya*. Ulangi ** sampai habis lalu matikan benang.


This flowers also look really cute in a brooch, just glue this flower on a base and glue the brooch pin on the other side.
 image
Bunga ini juga cantik loh kalau dibuat bros, bikinnya juga gampang. Tinggal melem bunga tadi ke sebuah base. Bisa dari kain felt atau seperti yang saya buat ini dari lingkaran rajut lalu tinggal dilem dan pasang pin deh.


Add me on your list  ^^

https://www.facebook.com/crochetandlipstick https://plus.google.com/u/0/+SekarSaraswati http://instagram.com/crochetandlipstick http://www.pinterest.com/crochetandlips/boards/ https://twitter.com/crochetandlips https://www.bloglovin.com/people/crochetandlipstick-2150187

or maybe visit my Circle Lens Shop 


Reposted from my old blog http://hanaiyzm.blogspot.com before it was hack
Repost dari blog http://hanaiyzm.blogspot.com sebelum di hack
Related Posts Plugin for WordPress, Blogger...